If you have a website on WordPress, you’ve reached the right post to get the complete steps to display Google Reviews (also called Google Places Review) on your business website.
Google Surveys show that more than 2/3 of customers are more likely to use products and services of a business that has positive reviews.
Whether you sell via a website or not, getting good ratings on the big review platforms like Google Places Reviews or Yelp Reviews is critical to your business performance.

In this article, I will walk you through steps on how to add Google reviews to your WordPress website at multiple positions. Let’s get started!
As a business owner, you can claim your business online with Google My Business Account by verifying your location and contact details . After logging in Google My Business, you’ll see a full dashboard that allows you to see tons of management features offered by Google.
This is like the “back-end” of your online business where you can manage all information under these menus. Here, you can also view and reply to your business reviews under Reviews Section.
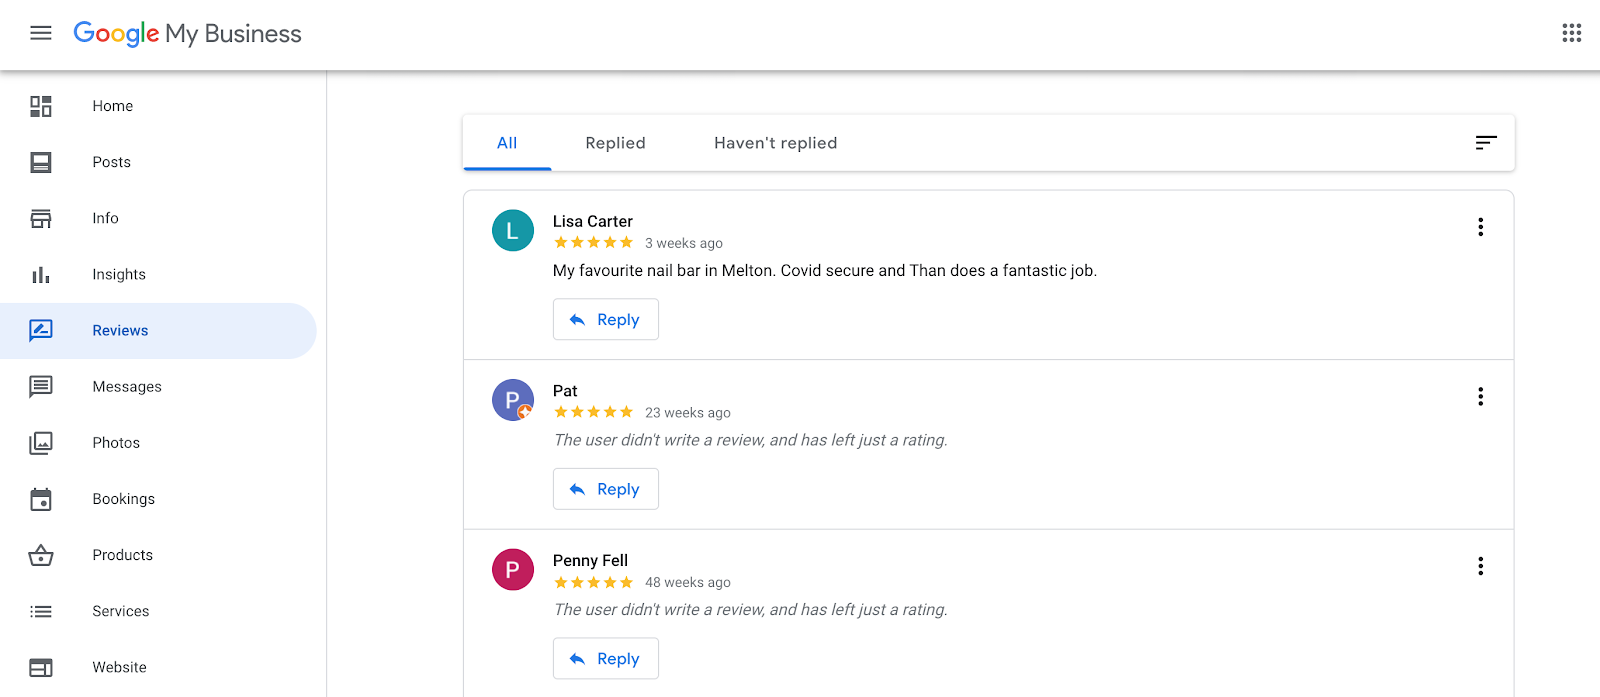
And what’s more -you can also to embed these reviews and ratings in our WordPress website . And that’s exactly what we are going to do now.
While you may call it Google reviews, Google customer reviews, or Google business reviews, the technical name is Google Places Reviews.
Let’s now look at the steps to show Google Reviews on WordPress Website
How to Display Google Reviews on WordPress Website
Step 1: Create a Google Cloud Platform account
Google Cloud Platform is a group of products and services to enhance your website integration and performance. They offer a free program for starters and users whose usage is staying within its Free Tier.
That said, let’s get started by visiting Google Cloud Platform. It’s easy to use your personal email address to register an account.
Important:
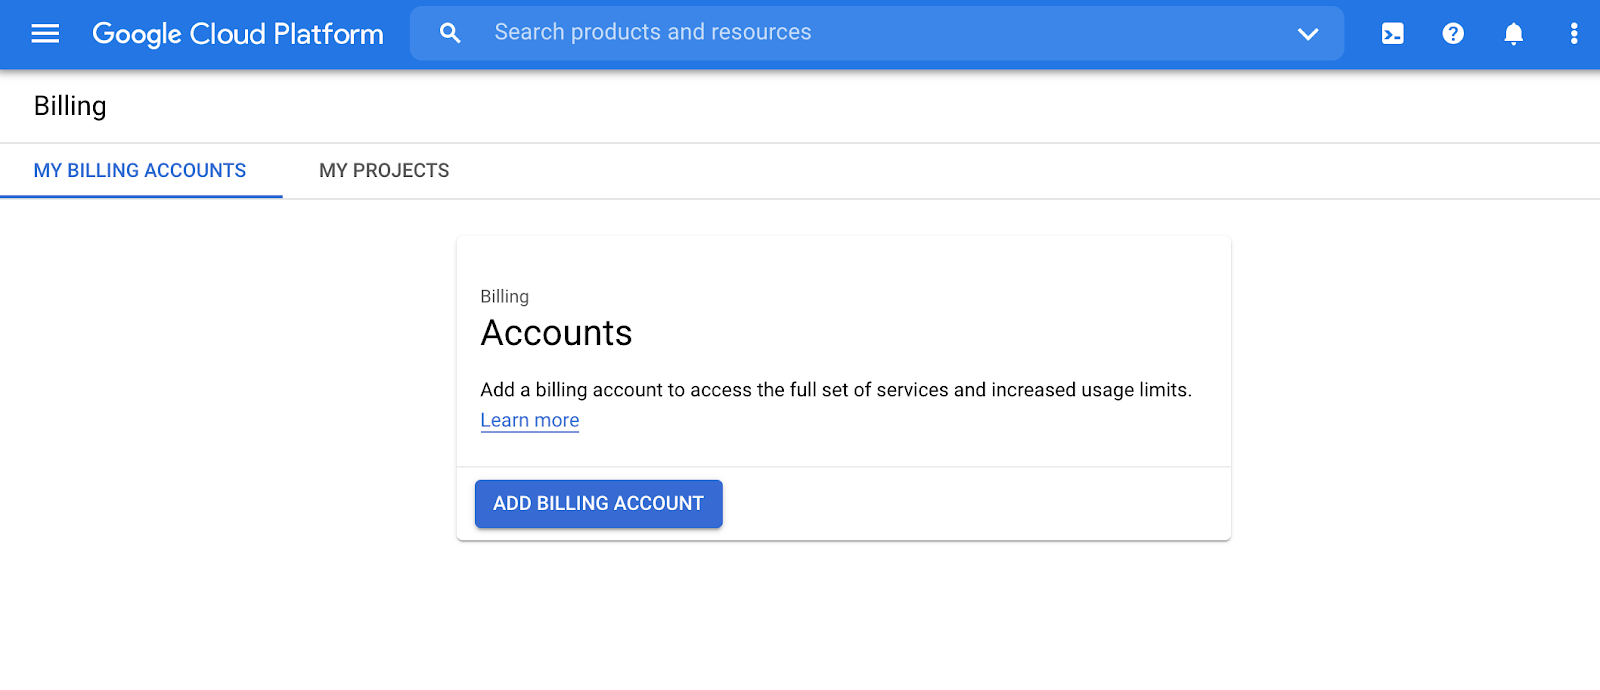
As of June 11, 2018, you have to add a payment method to Google Cloud Platform billing account to access Google core products. This helps Google verify your identity.
So please go to My Billing Accounts and click Add Billing Account if you haven’t already had one.
Some personal info you should prepare for registration:
- First name
- Last name
- Contact email
- Phone number
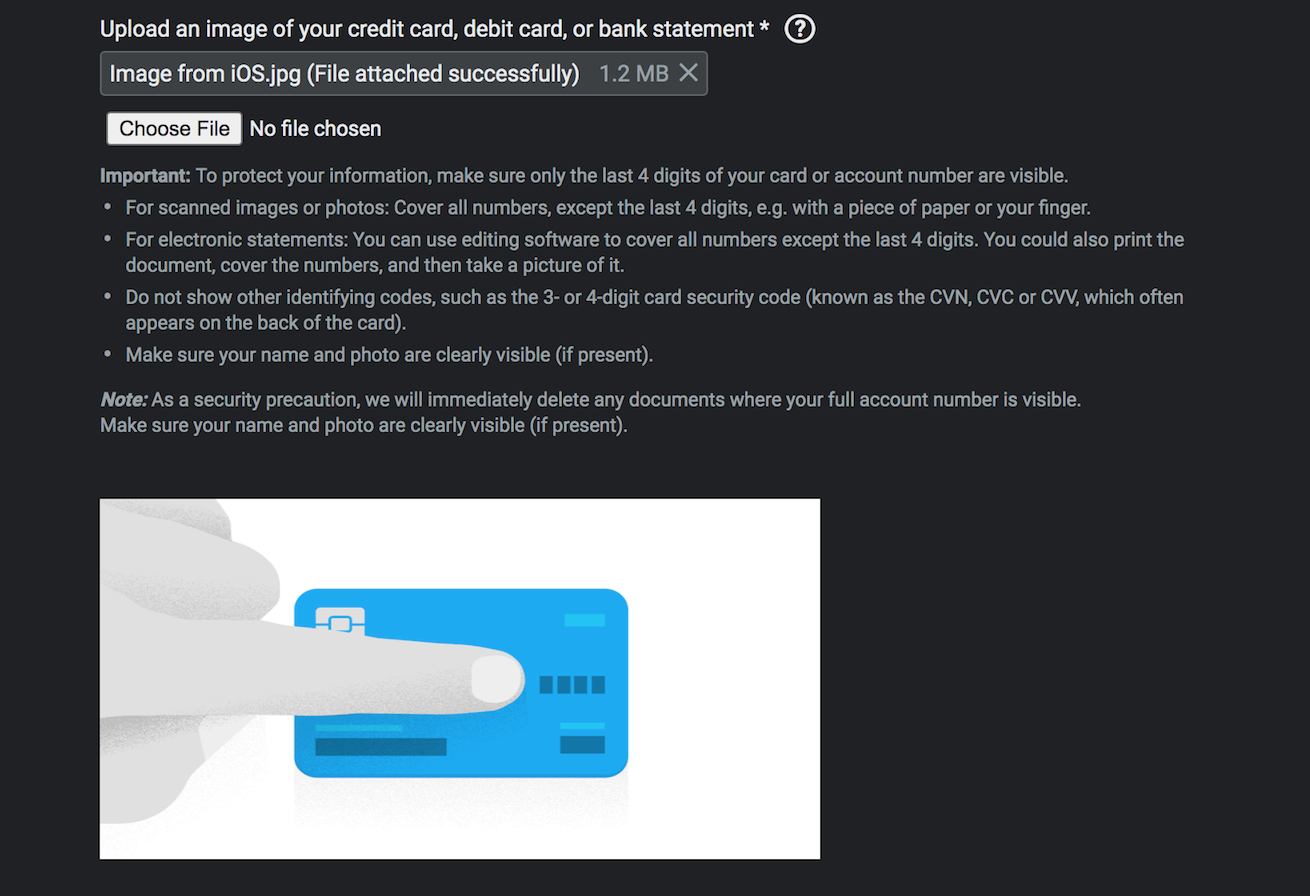
- Payment card info
Please note that Google requires you to upload an image of your physical card. But don’t worry, you can cover all the sensitive details, just make sure your name and 4 last digits are clearly visible.
When you finish this verification process, there will be a new Billing account in the tab.
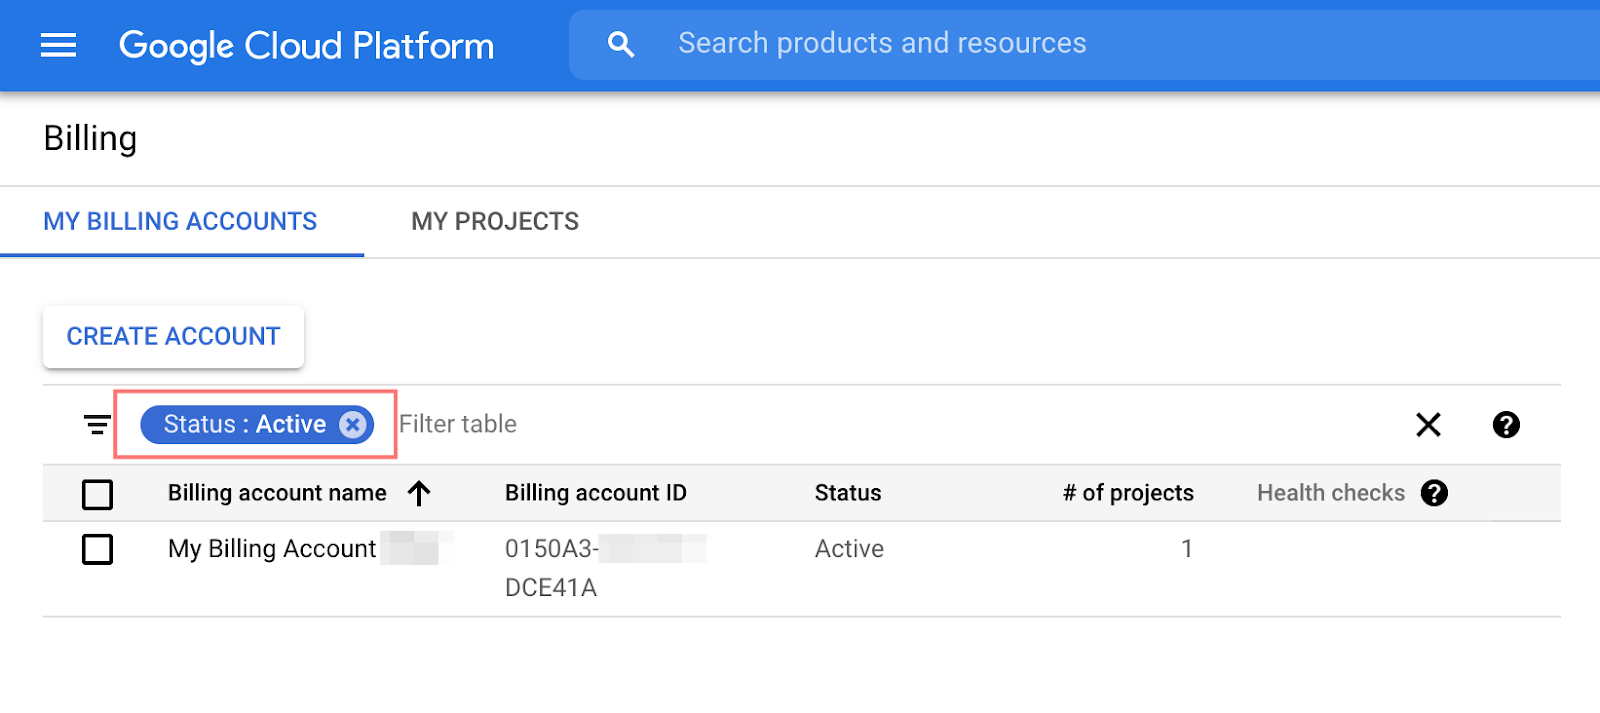
As long as you have at least one Billing account with Active status, you’re good to go for deploying any available Google Cloud services.
However, in the scope of this tutorial, you will only need Maps API and Places API. Here we move on to the next step of getting the access key for these APIs.
Step 2: Get Google Places API Key
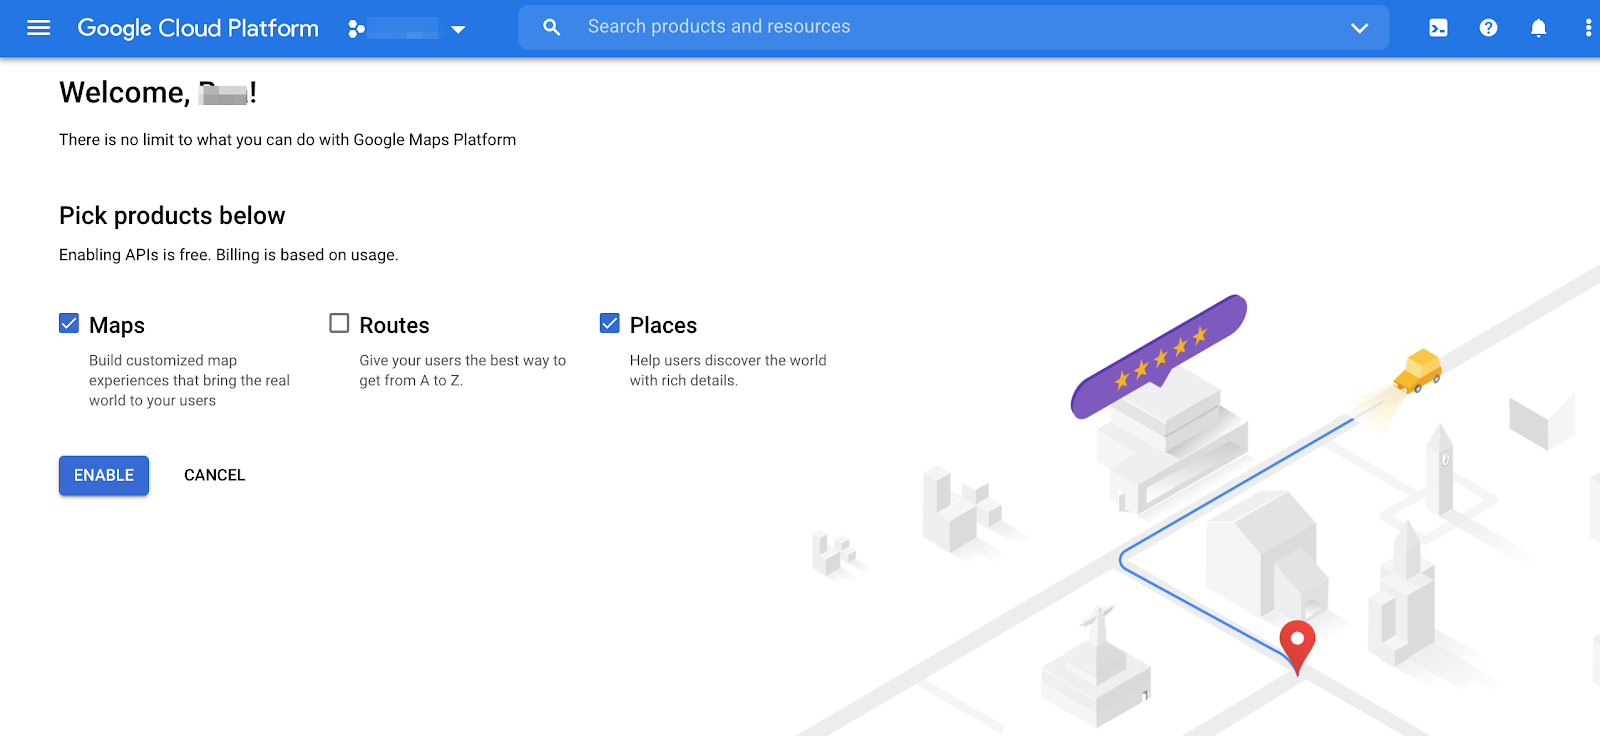
Step 1: Visit Google Maps Platform and click Get Started.
Step 2: Enable the necessary APIs: Maps and Places
The Maps API helps locate your business, while the Places API provides Place Detail— i.e. comprehensive information about the indicated place including user rating and reviews.
Quick note:
If you are wondering why “Billing is based on usage”, it is part of the Google Cloud offer. As of May 2018, Google Maps Platform grants $200 of monthly usage for free. Therefore, if you are embedding Google Maps and displaying Google reviews on your site, you are always kept within this free tier, meaning you won’t have to pay for using the services.
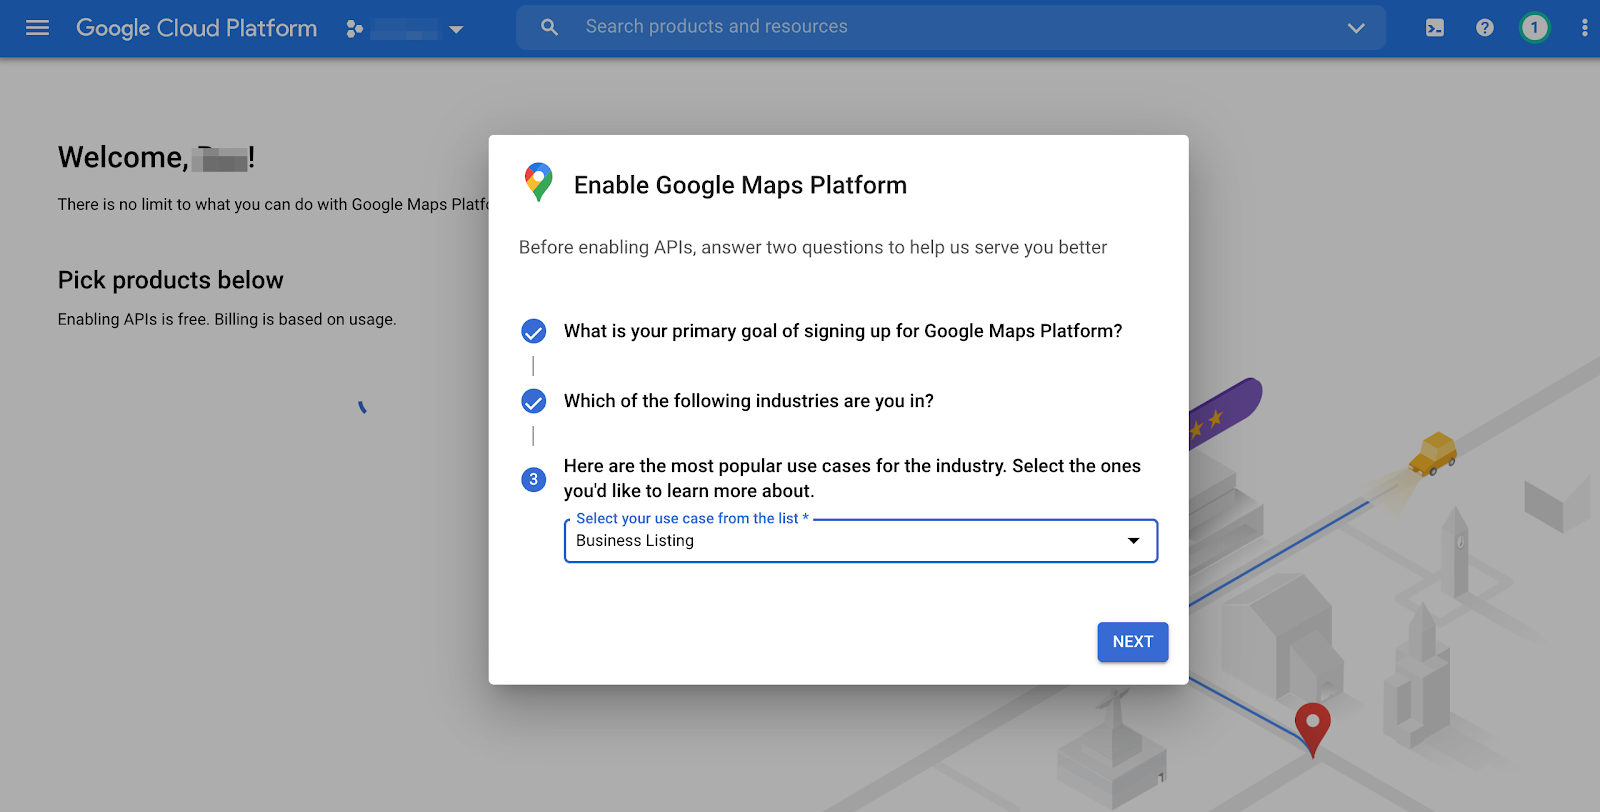
Step 3: Choose what fits you best, and click Next
Step 4: Copy your API Key
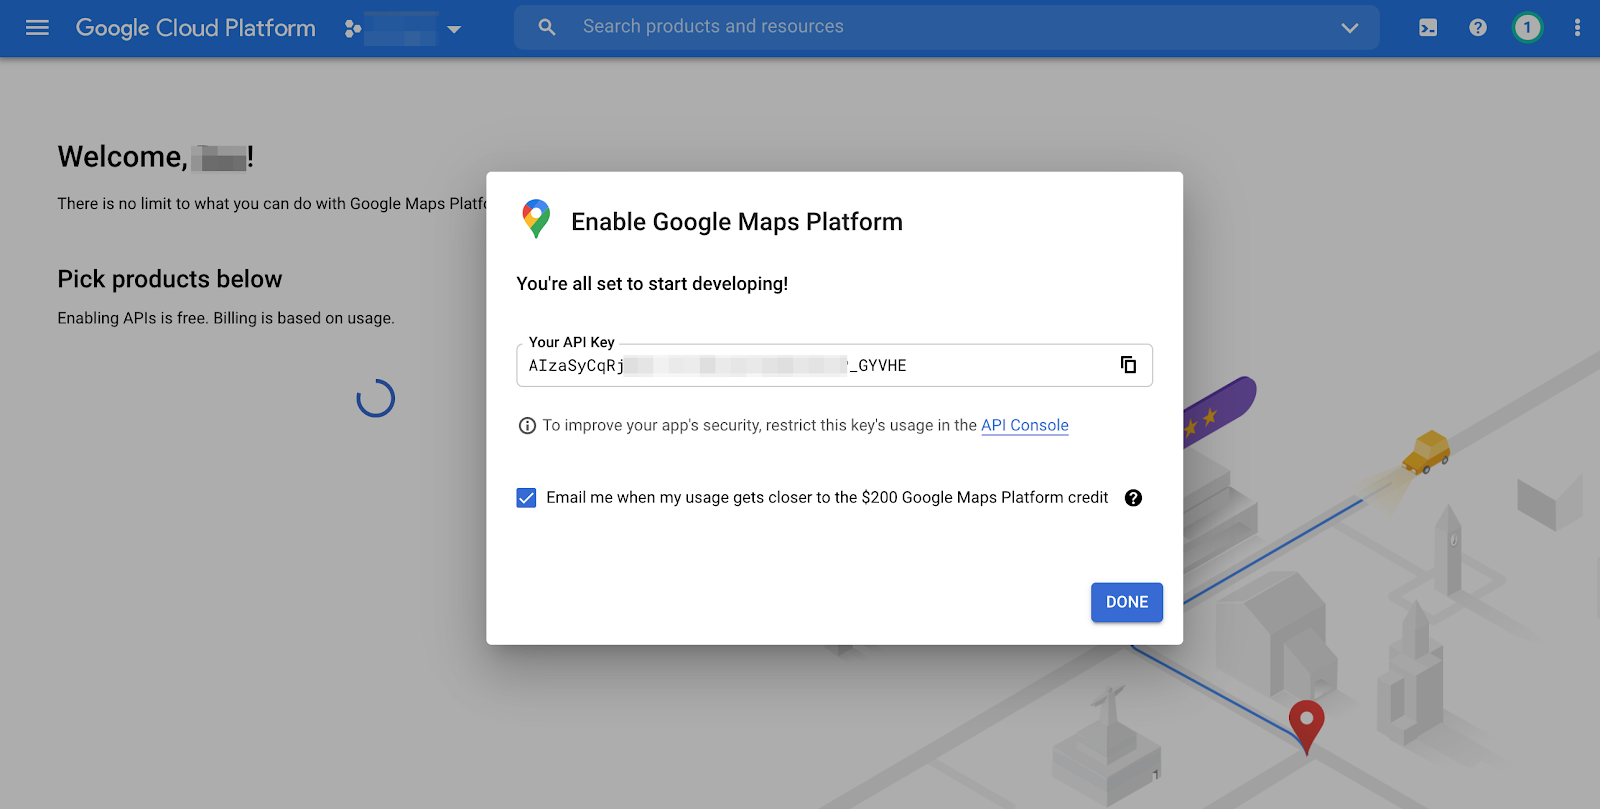
Don’t panic if you haven’t copied the API key in this step. You can always find it in your Google Cloud Console.
In order to utilize these APIs to deliver its recorded data to your WordPress website, you’ll need a third party plugin to help connect Google services and WordPress.
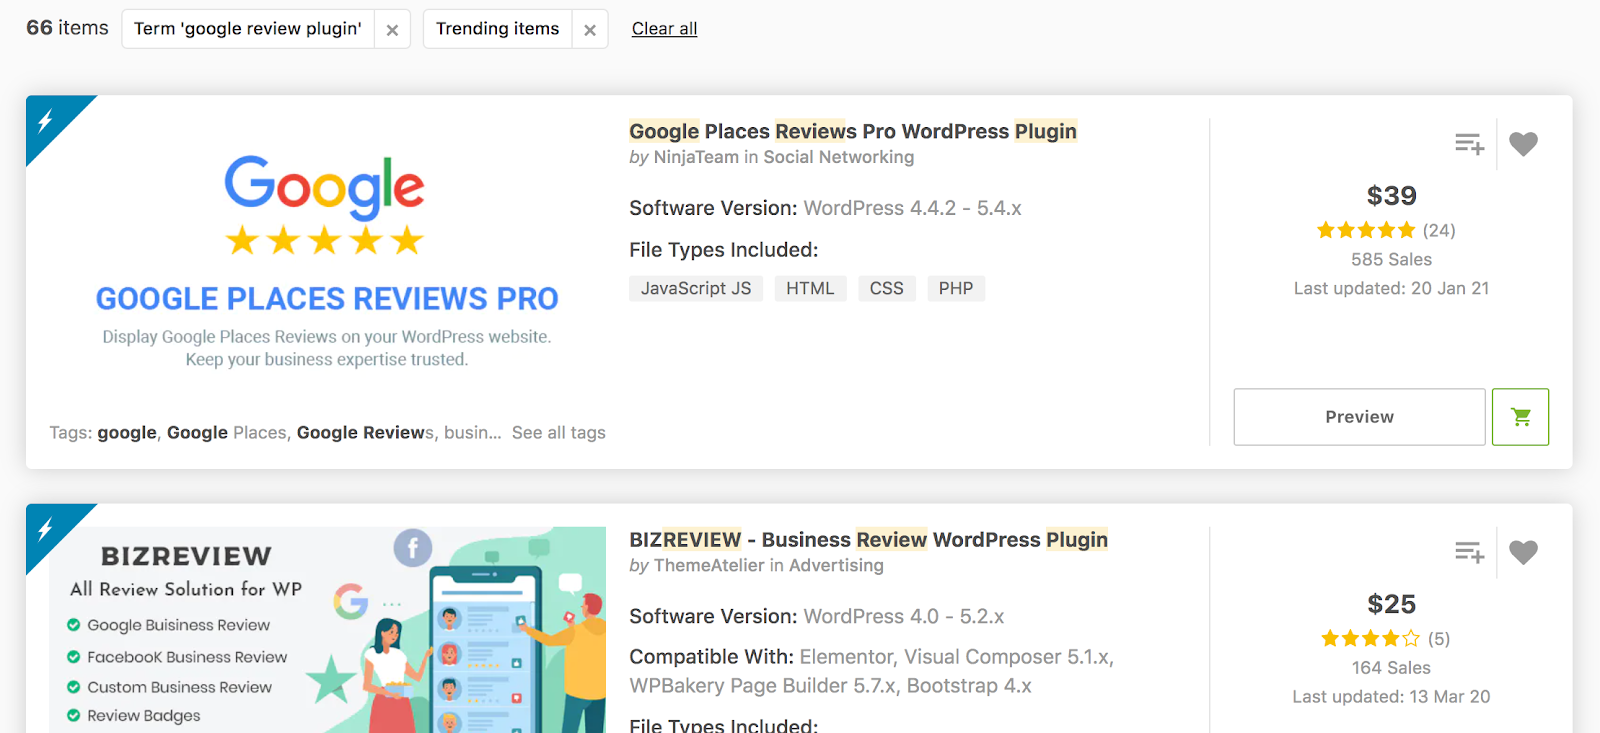
Step 3: Set up the plugin for displaying Google reviews
There are multiple WordPress plugins to help you do this. In this tutorial, I’m using Google Places Reviews Pro plugin as it is a feature-rich and best rated plugin on Codecanyon.
While the plugin is a paid option, it offers notable features to showcase Google reviews in multiple positions with your own designs:
- Body: display reviews in main content in posts/pages
- Sidebar: add Google Places badge and top reviews
- Footer: show favorable reviews
- Link: insert “Review us on Google” link in text or image
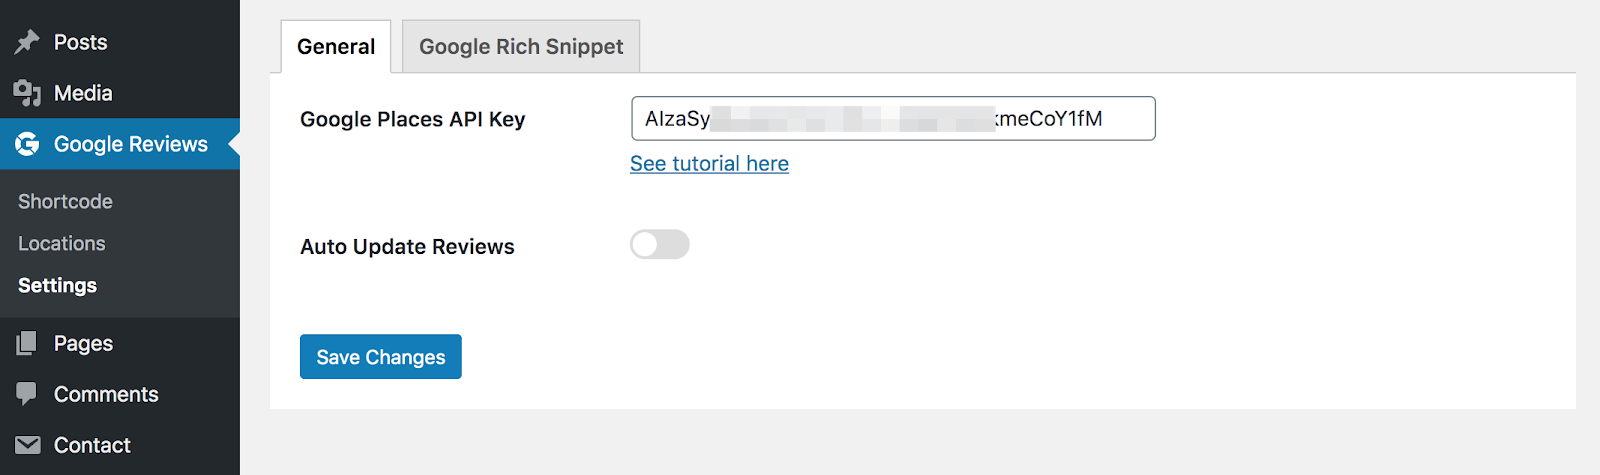
Now that you’ve activated the plugin, a Google Reviews menu item is added to your WordPress dashboard. Please go to Settings > General and paste the Google Places API Key that you’ve just copied from the previous step. Then click Save Changes.
Step 4: Add Google reviews to page/post
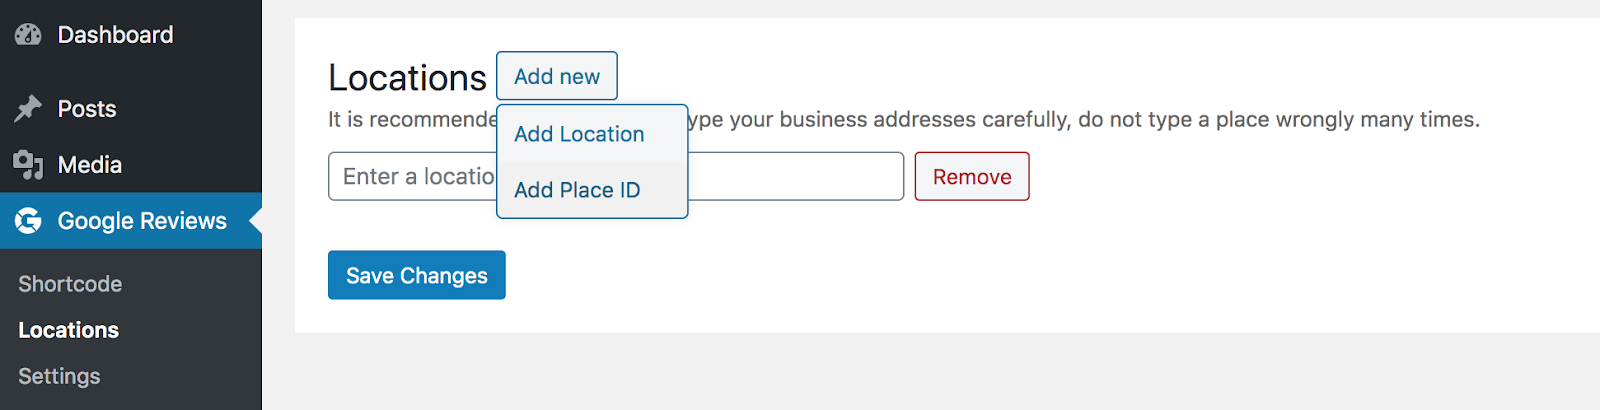
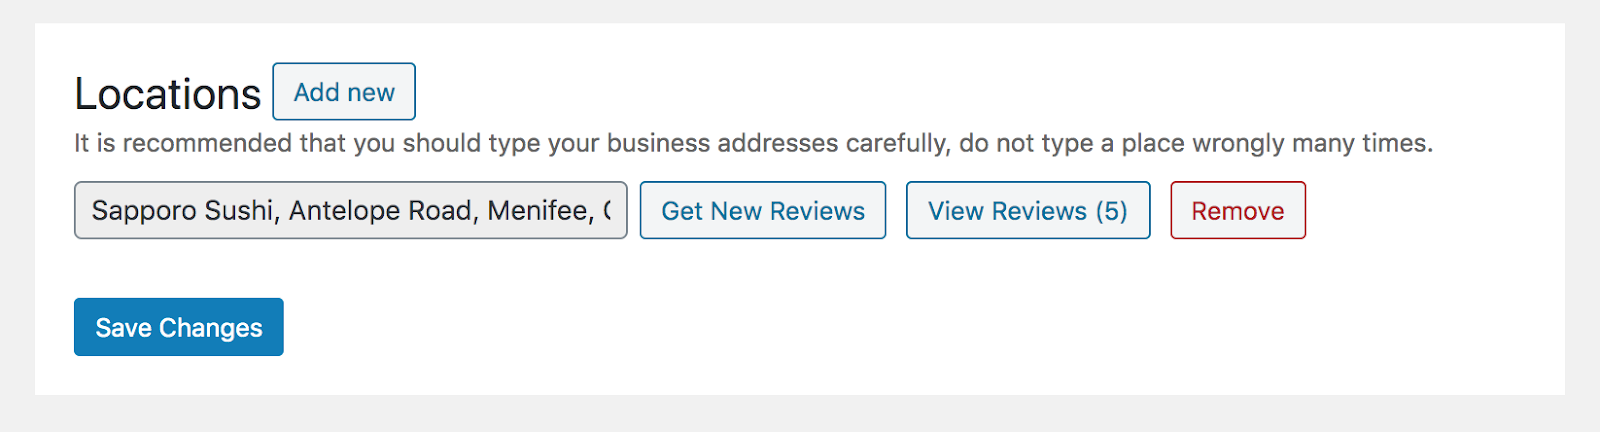
With this plugin, you can add multiple business locations to display on different sections of your website.
Step 1: Go to Locations > Add Location
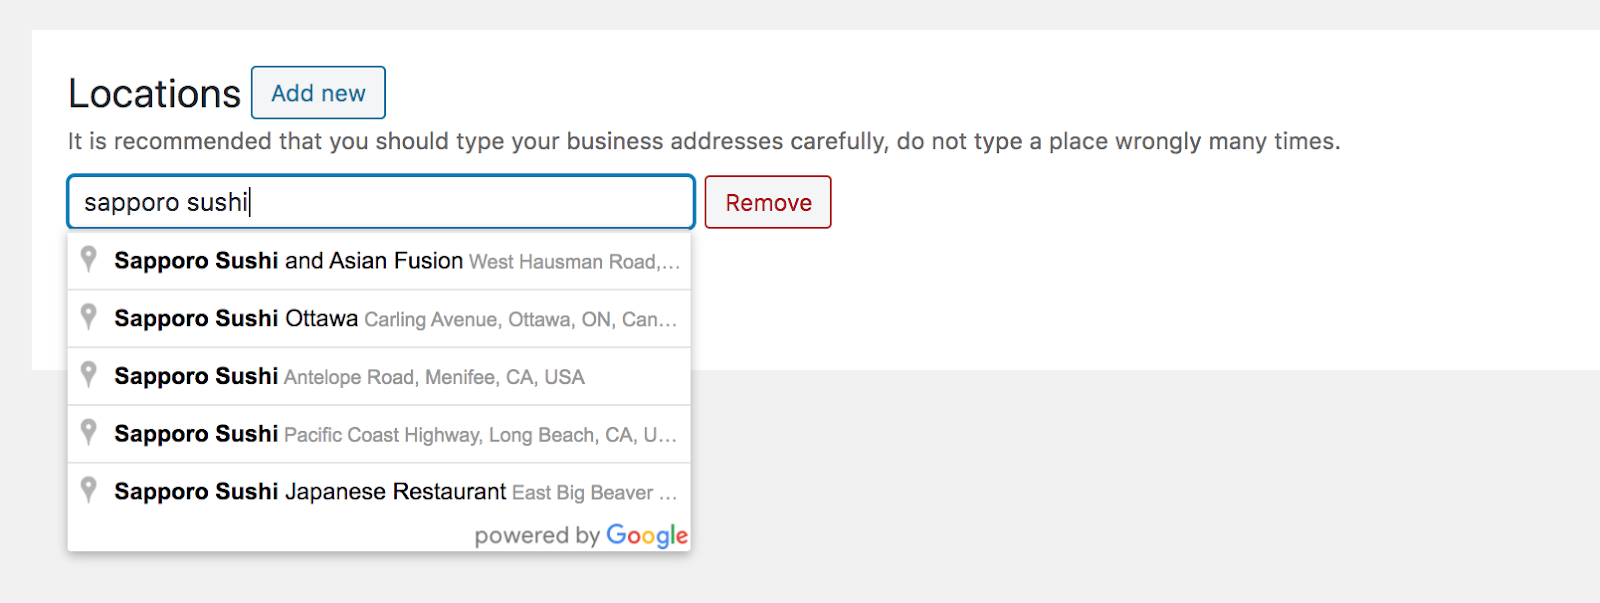
Step 2: Type your business name and address, then pick the correct one from the drop-down
Step 3: Confirm your location and click Save changes
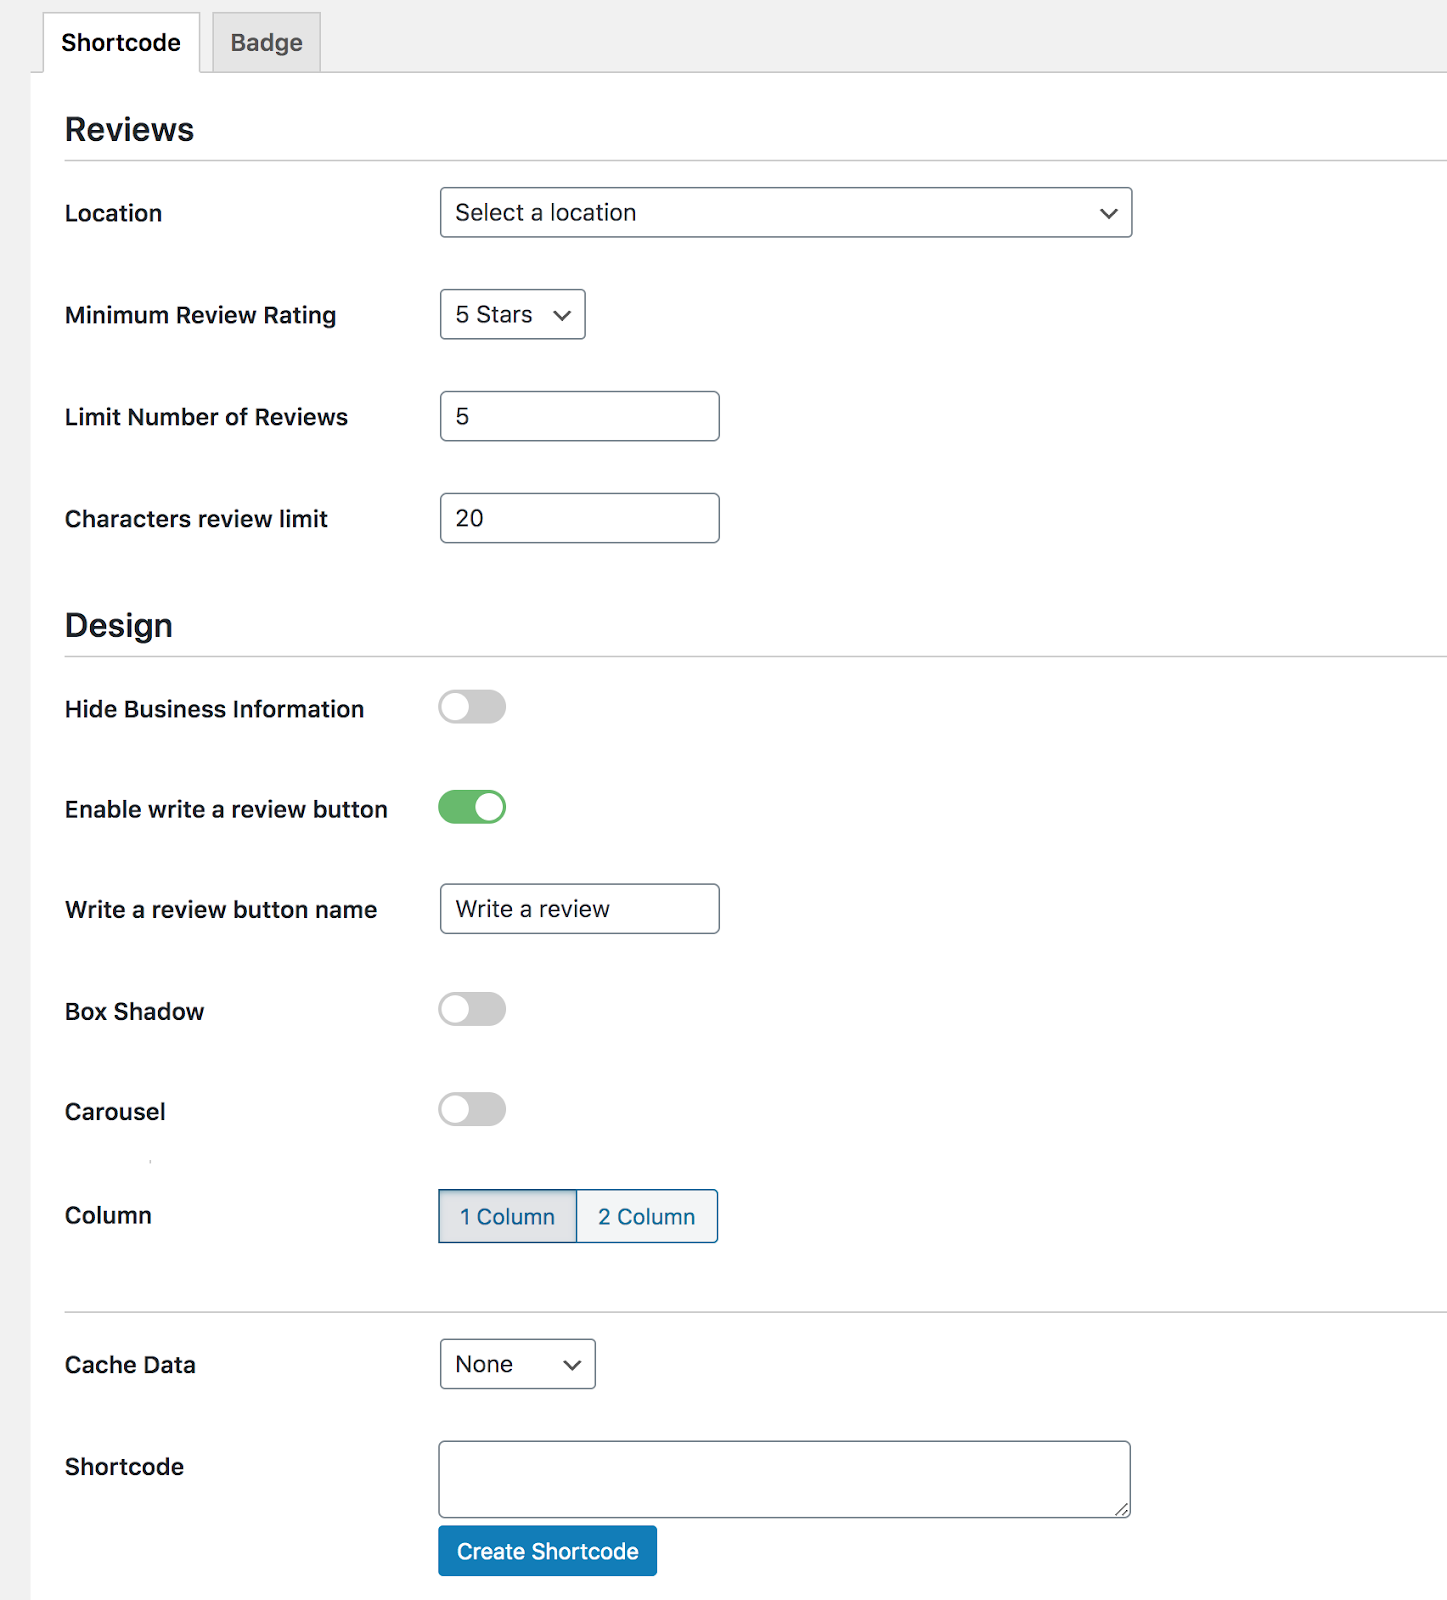
Step 4: Go to Shortcode > Select a location
Here you have lots of options to filter the reviews, limit text display, and edit the box design. So go ahead and tweak anything you want, and then please click Create shortcode to generate a shortcode to use in any pages or post.
Step 5: Paste the shortcode in a page/post
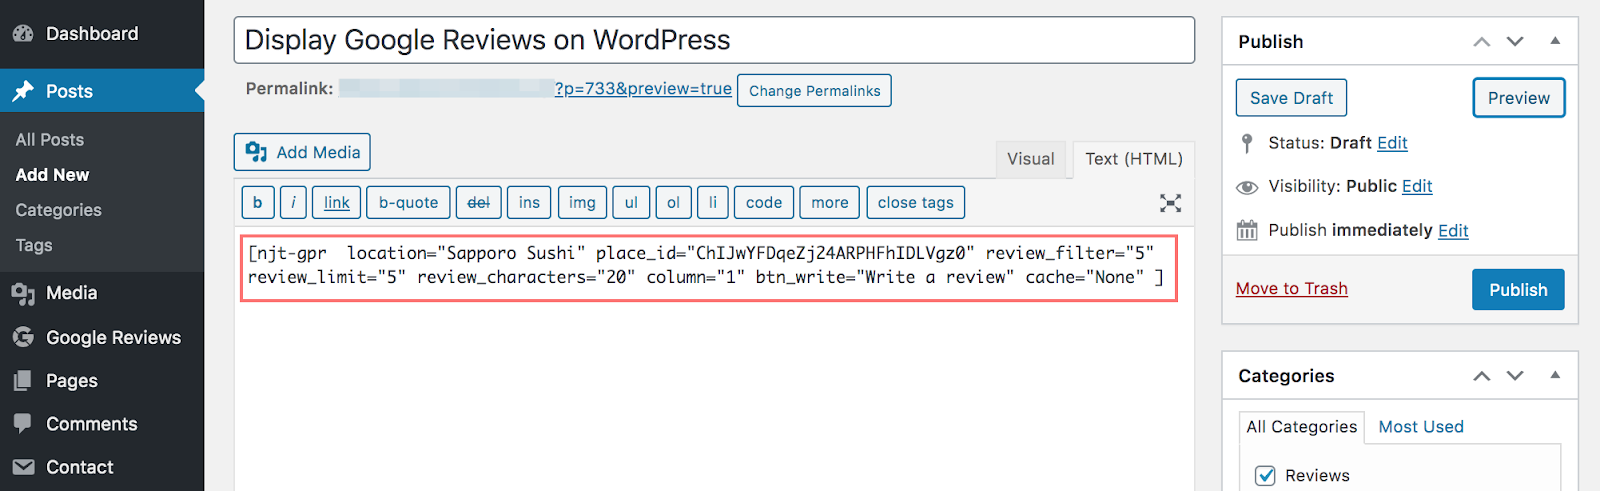
Step 6: View page/post and enjoy the result
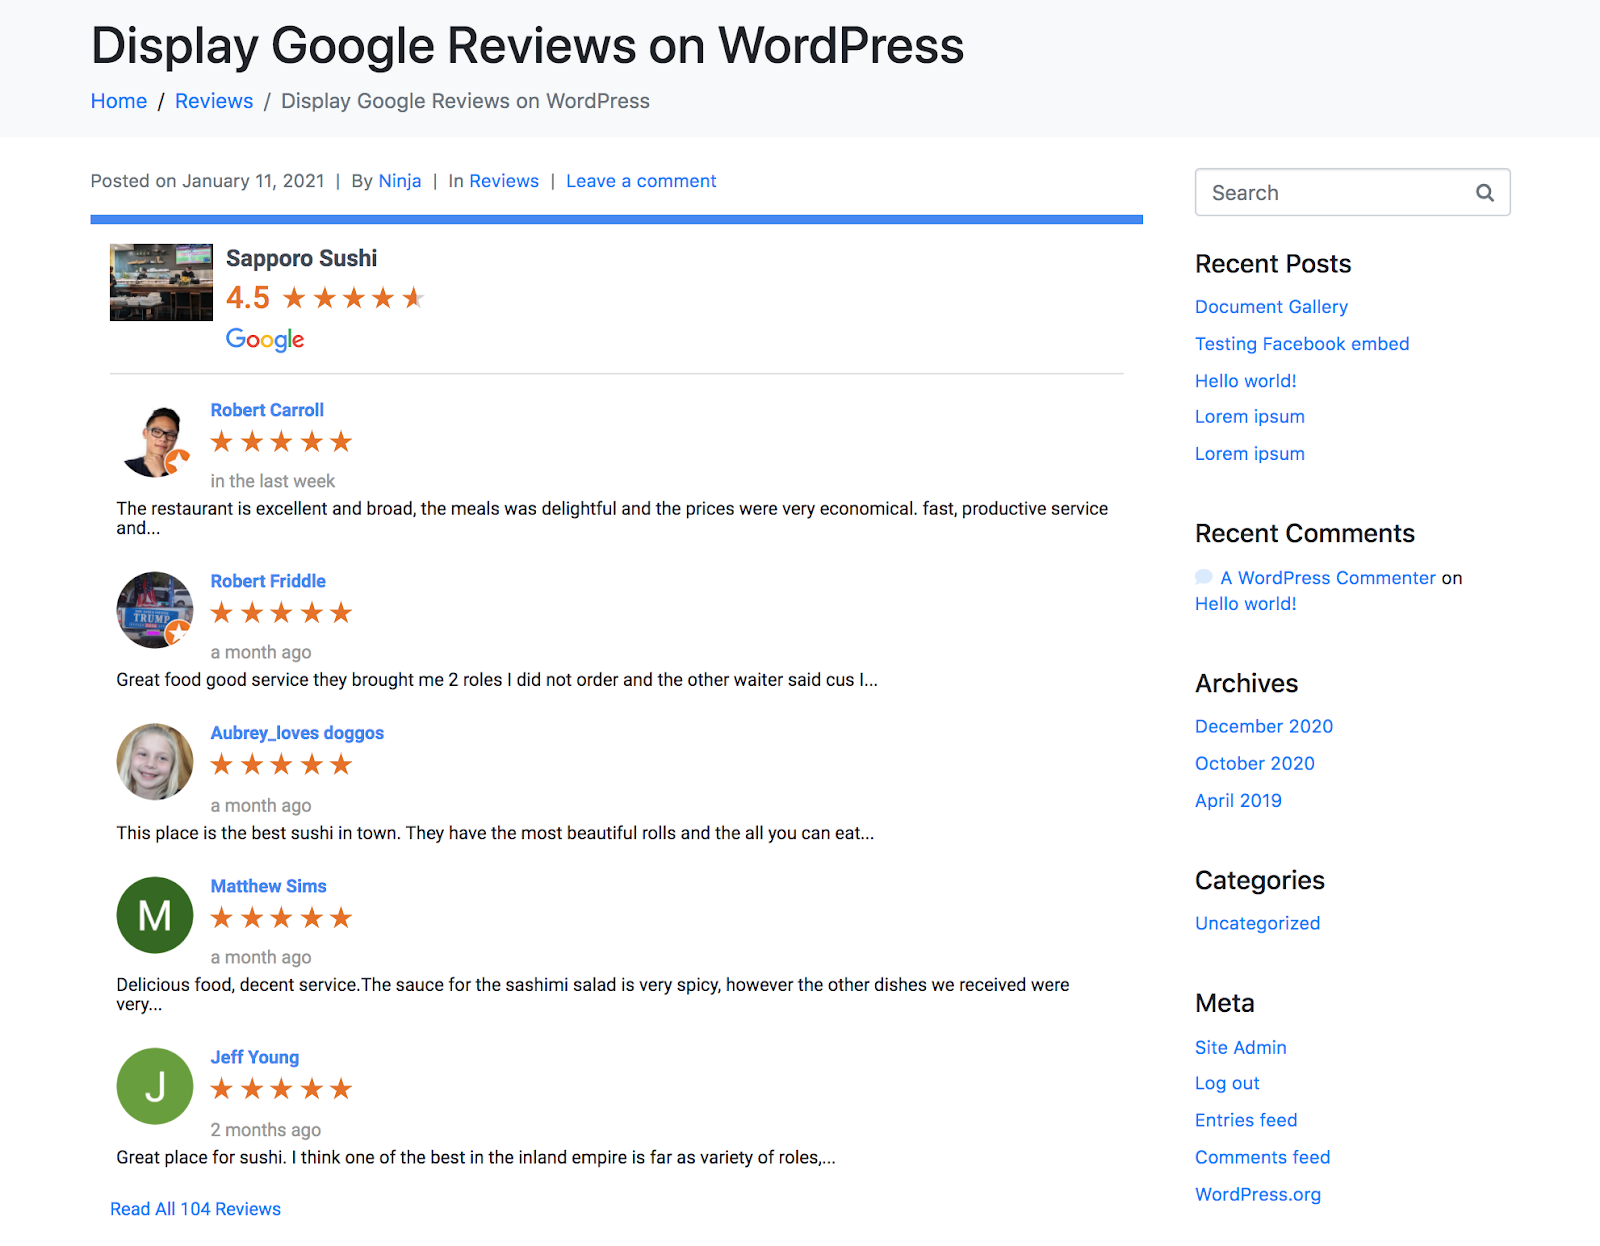
This is how the Google Places reviews box displays on a post.
Step 6: Add Google reviews to sidebar and footer
Step 1: Go to Appearance > Widgets
There are several Google Places reviews widgets over here. Please pick one that suits your website layout.

Step 2: Customize the reviews widget
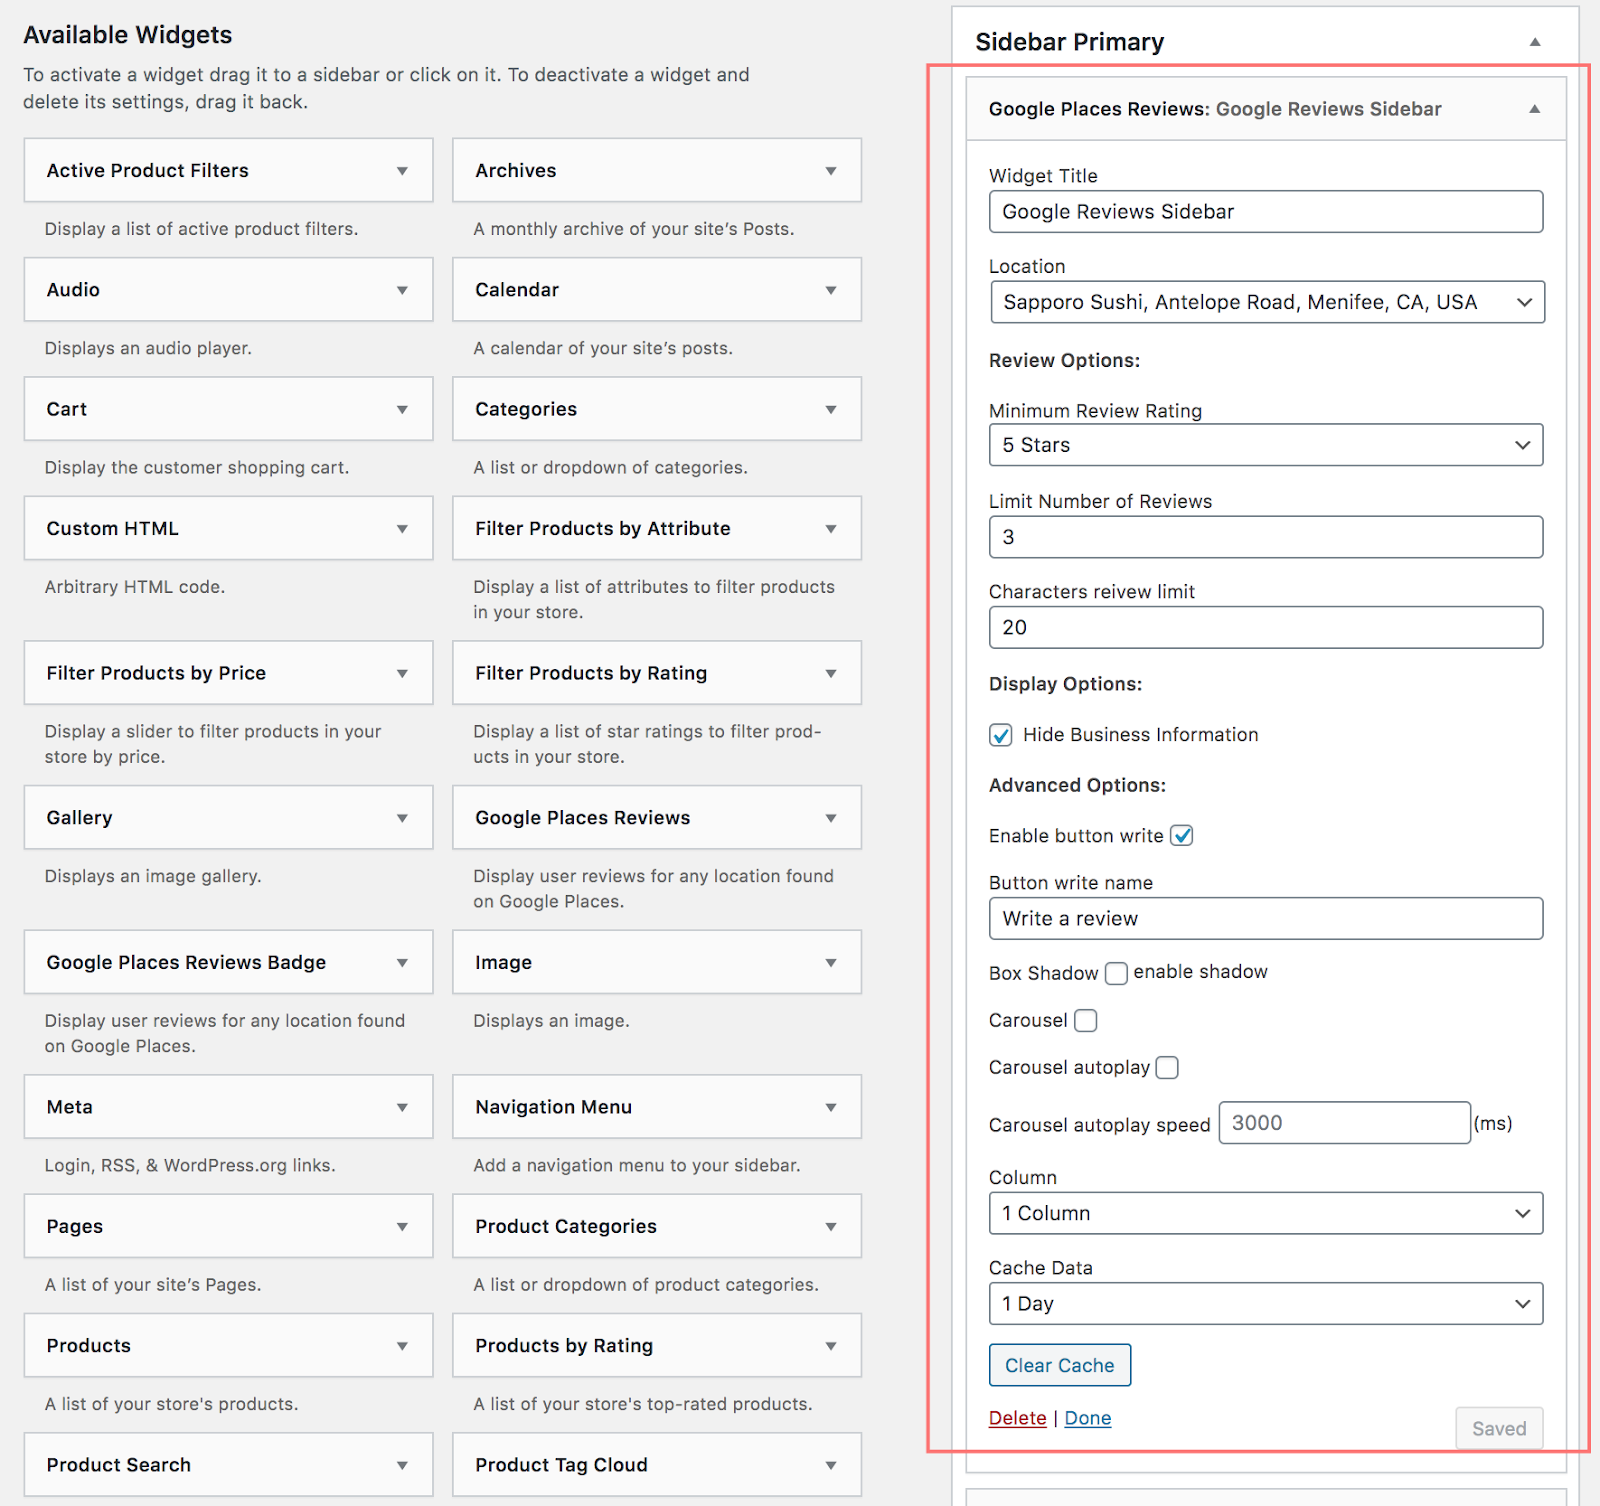
When you’re happy with all the adjustments, just save changes and now you’re good to go. These widgets can be embedded anywhere on your site. And depending on the space, you can choose to display what are most impressive as social proof.
Step 7: Create a Google Review Link to request and get more reviews
Here comes the tips and tricks for fresh entrepreneurs.
For those who are running a newly opened business and need to attract more nice reviews, you can reach out to your visitors or customers to ask for it. It is a hidden feature that you can create a unique Google review link for your store, restaurant, or service location.
Best use cases for Google review link:
- Share it via social media
- Include it in your Thank you emails
- Insert it in text, image, button on your site
Here’s how to create a link for customers to write reviews and apply it in a user-friendly button in WooCommerce emails.
Step 1: Find the location’s Place ID
Please visit Place ID Finder. Type your business address and pin-point the location. When clicking on that location, you will see its Google Place ID as an alphanumeric string.
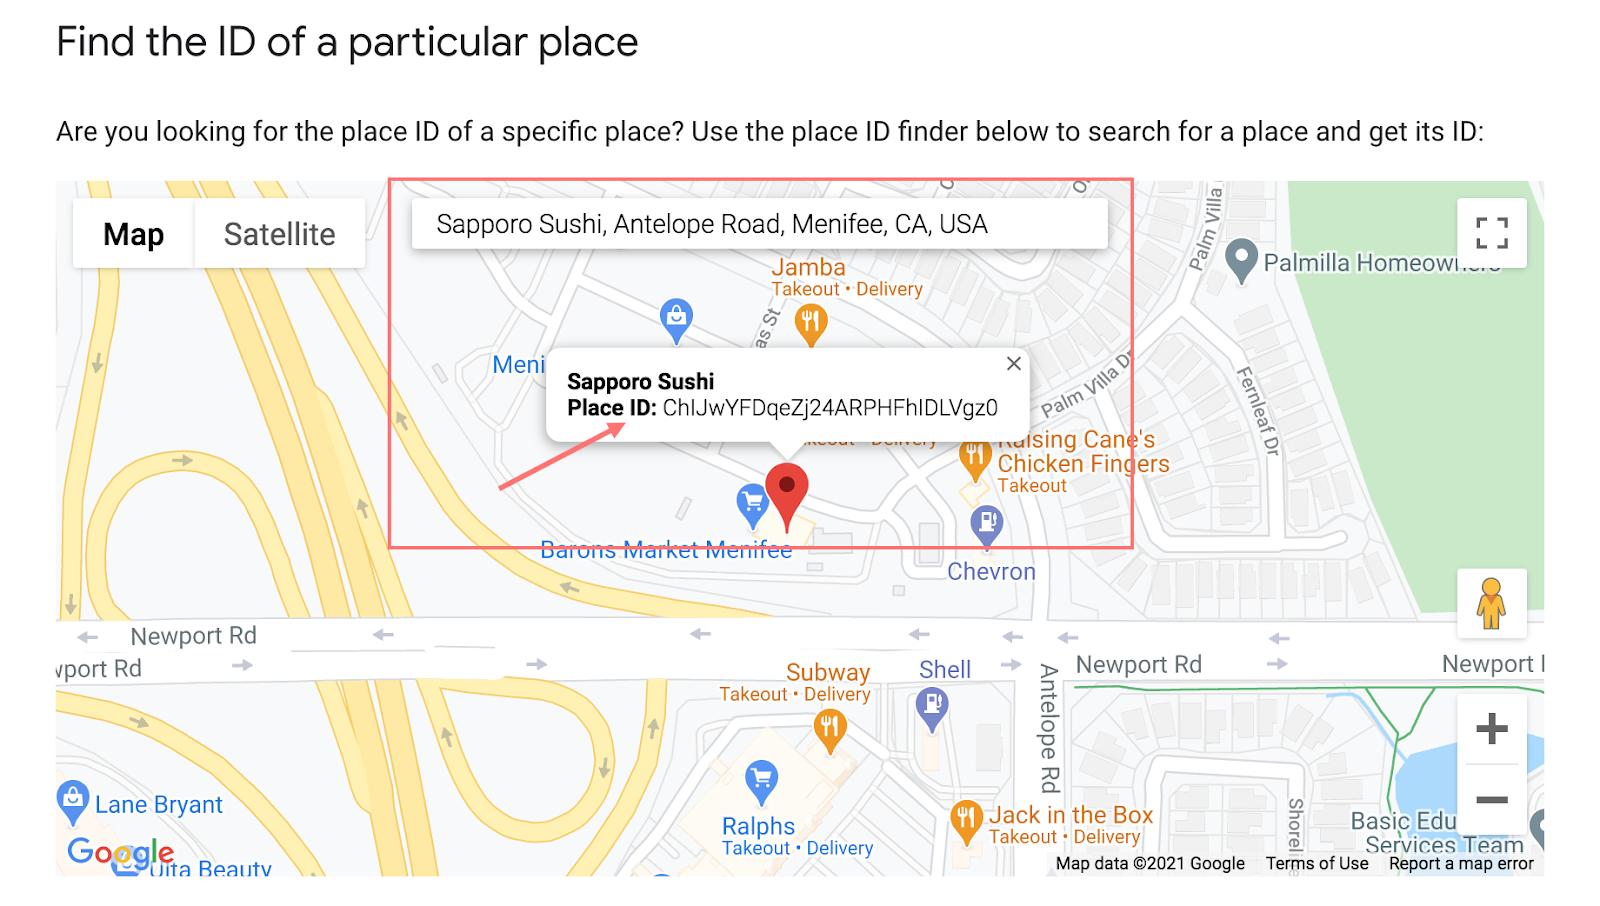
Step 2: Paste Place ID into the link
Here’s the link format: https://search.google.com/local/writereview?placeid=ChIJwYFDqeZj24ARPHFhIDLVgz0
Just replace the placeid value with your own Place ID and you will have your unique business review link.
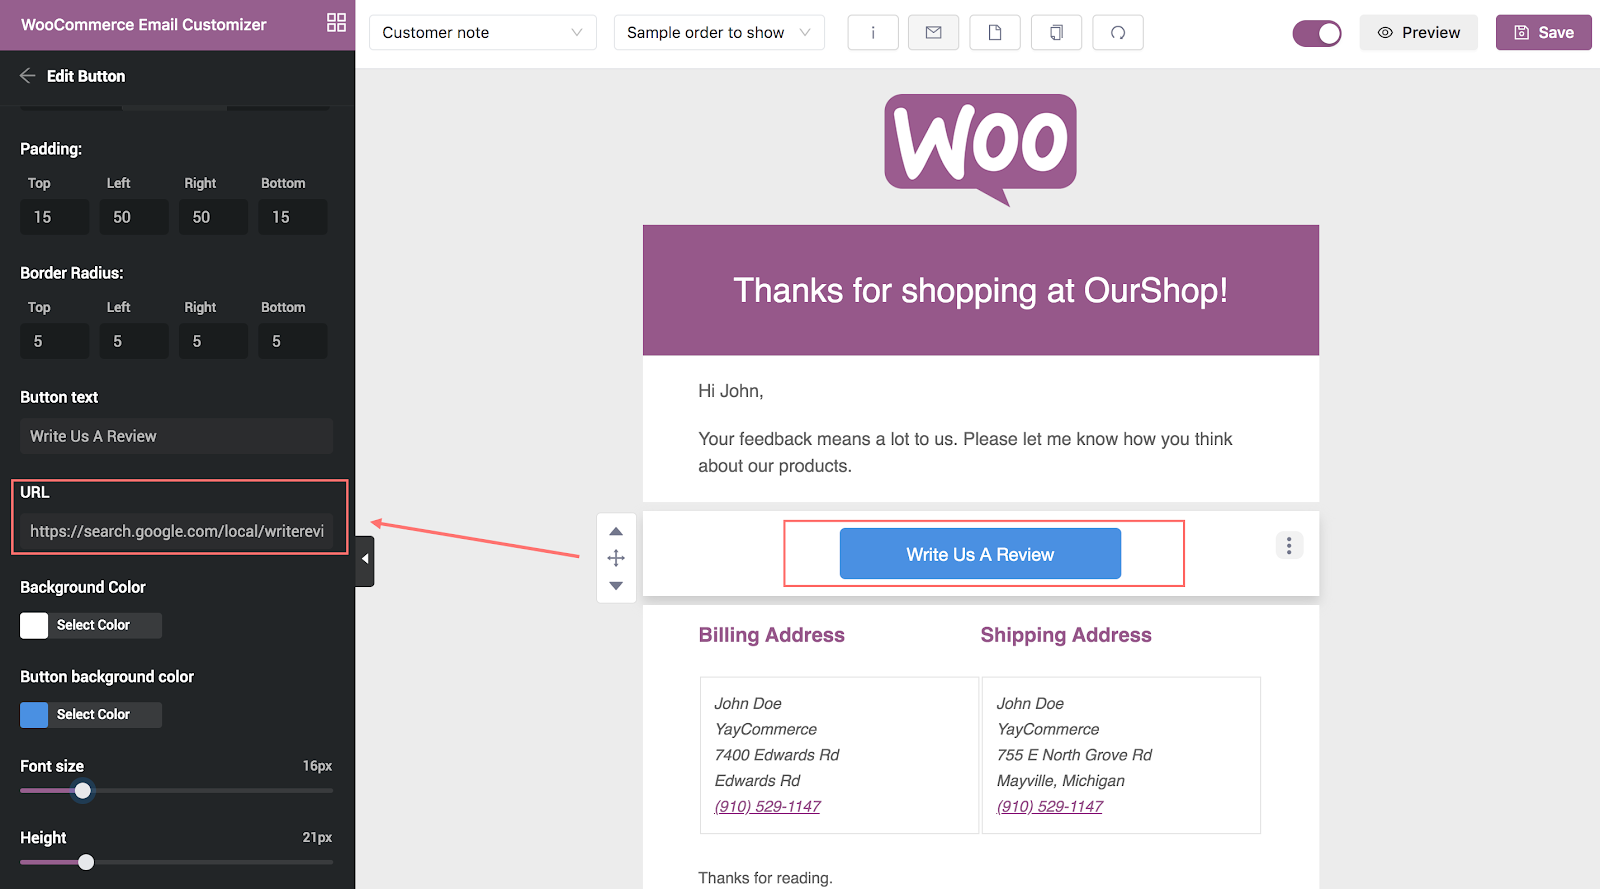
Step 3: Insert the link in your website or emails
If you want to take it further than your sidebar and footer, you can embed the link in a button in WooCommerce transactional emails. A free WooCommerce email customizer like YayMail can help you do that.
It allows you to drag and drop to add a button with a URL. You can also customize the button styling to fit best with your brand scheme color.
Easy peasy, huh?
Now you can send the email and ask for your customers to leave a review.
Anyone clicking on your link will be directed to your business location and asked to leave a review. This is how it looks on the user screen.
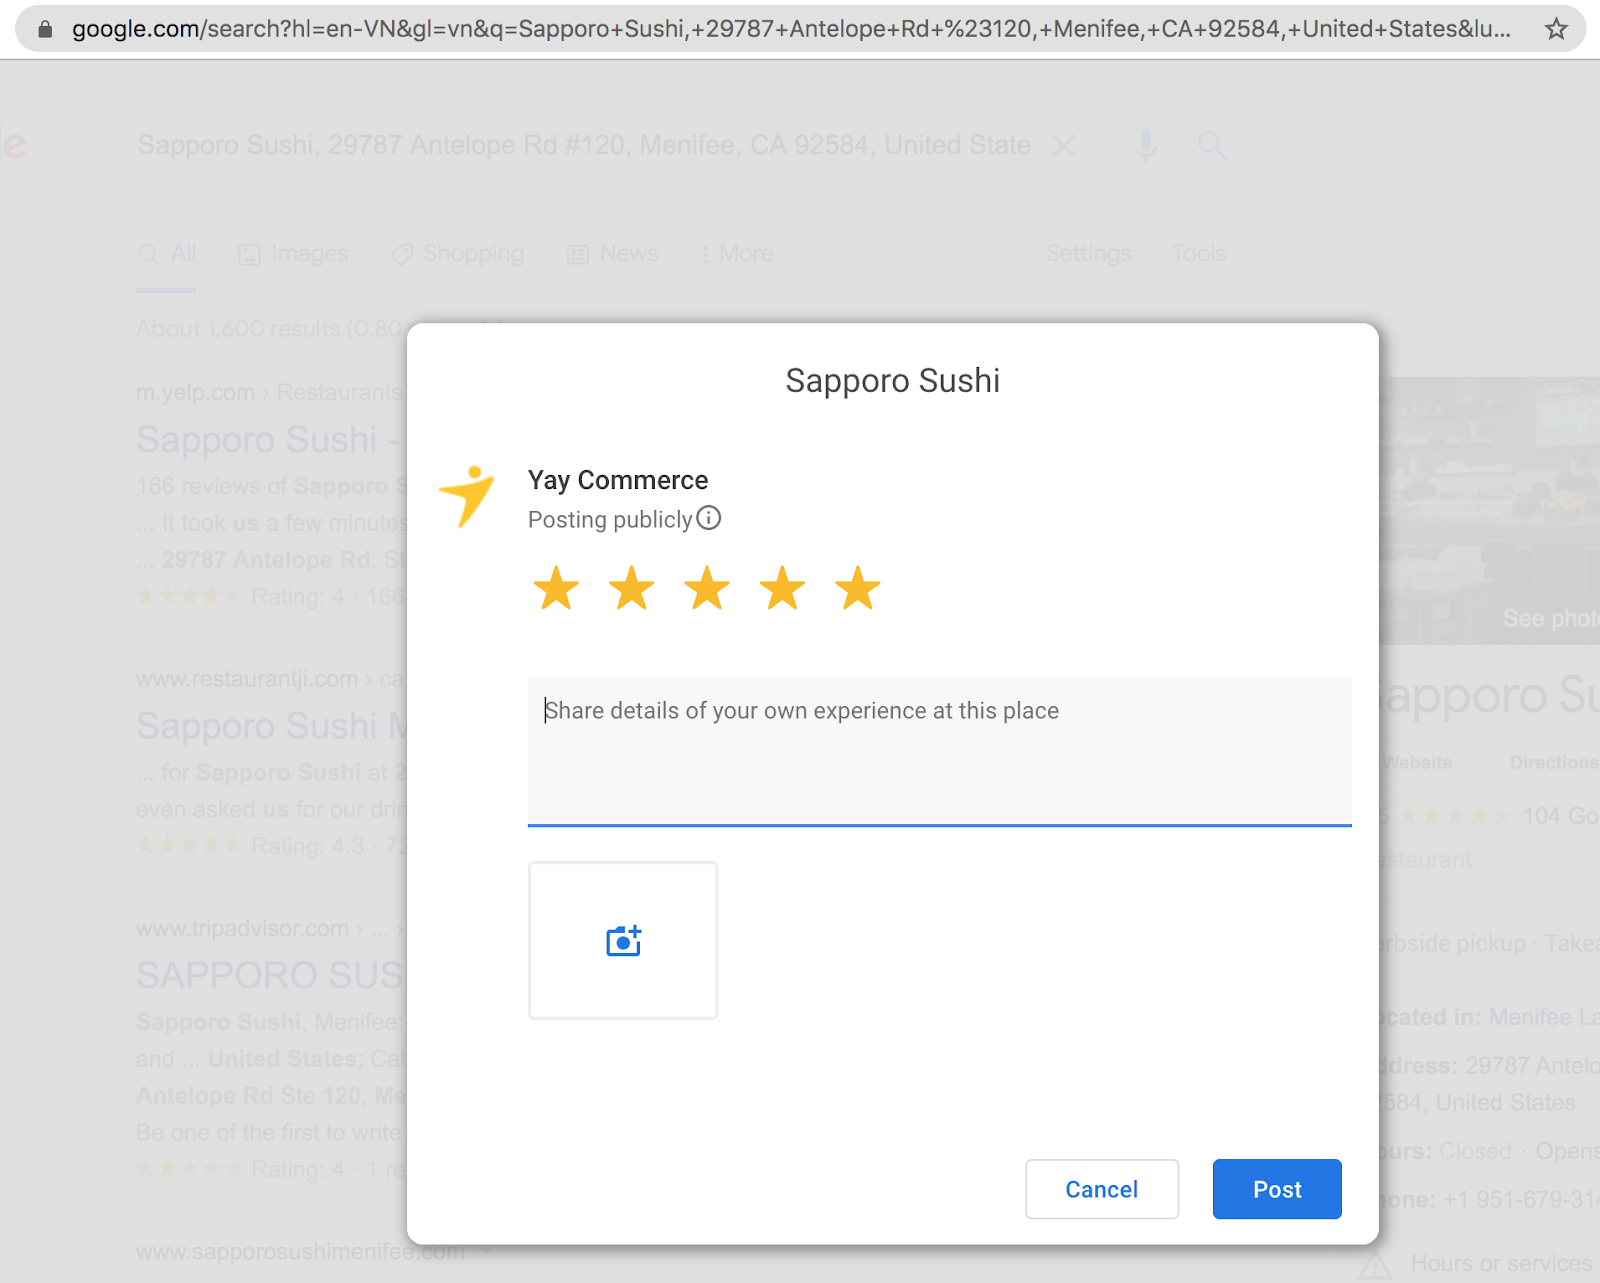
They can set the rating, write their opinions, upload images and endorse your business.
That’s cool, huh?
Ending thoughts
It is not a secret that beautiful and positive Google Places reviews will take your online storefront to the next level.
With the help of Google Places Reviews plugin, you can display the selected best reviews on your WordPress website. You can even insert a Google review link into your WooCommerce emails to ask for nice reviews.
Have you applied these blog monetization tips and tricks for your WordPress site? Let us know your thoughts in the comment box below.
Author bio:

Thuy Nguyen is an online marketer and professional blogger. When not creating content for YayCommerce.com, she can most often be found at some cafés in town, reading Graphic Guides, or enjoying a good laugh with The Big Bang Theory.