If you are looking to add or change the logo on your WordPress website, this guide will help you with the details. We will walk you through the steps on how to add a customized logo on your website header, change logo size etc.
Having a professional logo on your blog not only helps in website branding but also enhances its look and feel. It is definitely a task to prioritize when starting a blog. But often it does not get the attention it deserves. By default, WordPress does not apply a logo to your website. It only shows your website Title in the header space of your blog.
But you can easily add or change the logo by following some simple steps.
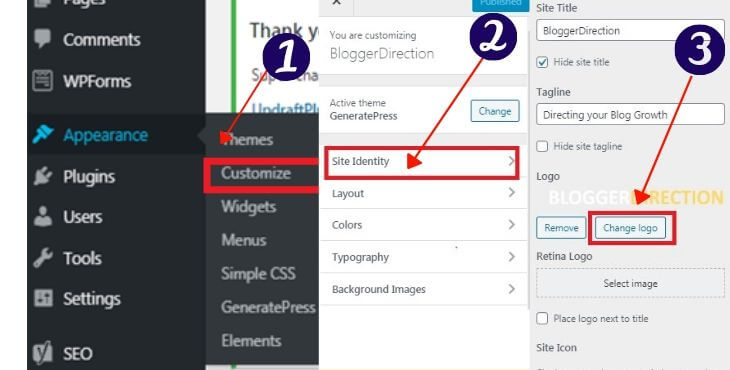
How to change the Website Logo in WordPress? In most themes, you can change the logo by going to the Appearance section in the WordPress dashboard and selecting Customize. Here, you get a tab called “Site Identity” which has option to change the logo by uploading an image from your computer or selecting an existing image from your media library.
Let’s go into these steps in detail:
How to Change Logo on WordPress
The option to change the WordPress Logo changes from theme to theme. However, most themes give you an option to change the logo in the “Appearance” section on your WordPress dashboard.
Here are the standard steps to change in the WordPress logo:
- Step 1- Log in to WordPress Admin. On the dashboard-Left pane, click on Appearance (paintbrush icon) from the list of options – and select Customize
- Step 2- Click on the tab- Site Identity which gives you the option to change the logo and also change the Site title
- Step 3- Click on Change Logo and upload the image which you want to use as the site logo
- Step 4-Click on Save and Publish
Note: In case these steps don’t work for you or you are not able to find these options, it’s probably because of your theme. Some themes may have a different path to change the logo. For this, just google how to change the logo for the xxx theme (your theme name) or check on the support section of your WordPress theme.
The “Site Identity” tab also gives you the options to change Site Title and Site Icon
Let’s look at what these terms mean and how to access them:
Meaning of different terms – Logo, Site Title and Site Icon
- Logo is an image that appears on the Header section of the website and is visible on all its pages. It can simply be the name of your blog i.e. text or symbol or combination of both in image format.
- Site Title is the name of your blog which appears next to the logo in the header section. You can choose to hide the site title and keep only the logo
- Site Icon also called favicon is the image which appears next to the url of your website in the browser
Don’t waste more time- Use the Free WordPress Shortcuts Cheat-Sheet
Speed up your content creation. The 20% shortcuts that I use to save 80% of my time on WordPress.
What Size of Logo to Use
Getting the right image size for your WordPress website can be a bit of trial and error.
The theme you use also has an important role here.
Generally, an image size of 250 px (width) x 100 px (height) works well for most blogs.
It also depends on the choice of logo style- horizontal or vertical.
Here are some sizes you can consider for the logo you choose to use on your header
For horizontal layout:
– 250 px x 150 px
– 350 px x 75 px
– 400 px x 100 px
For vertical (square) layout:
– 160 px x 160 px
How to Design your Site Logo
The logo you use for your website can be either a word, symbol or combination of both. Think about what is the feeling you want to leave with your visitors.
Pro Tip: Upload logo in SVG format to keep your website light (you have to use SVG Support Plugin for this) or use WebP format
You can draw inspiration from the logos of the top brands that you use. The choice of colours, symbol etc. should flow from the theme of your website.
You may need a little help here.
So let’s see some great tools to help you with the logo making exercise.
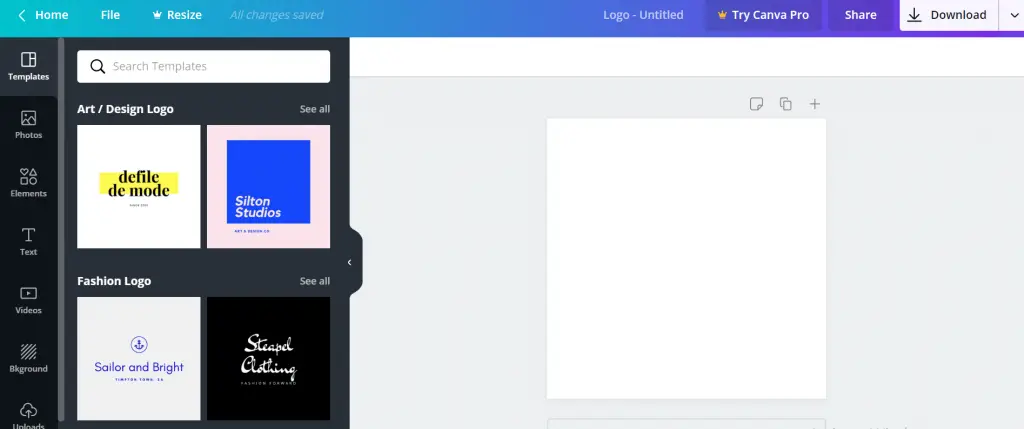
You can make a professional logo for free by using a great online tool Canva.com. The website has a lot of ready to use logo templates which you can customize based on your site requirements
Canva – A Great Resource to Create Your Website Logo
Some things to keep in mind while making a logo for your blog:
- Make it unique- Stand out from the crowd
- Make good use of colours and fonts. You can use a combination of colours and fonts.
- Keep it simple, don’t go overboard
- Make it memorable
Some other resources that can be used to create a website logo include Adobe Express and Logaster.
How to Create a Favicon for your Website
Favicons are the tiny icons that are displayed before the URL of your site in a browser’s address bar.
The favicon also appears when your website is ranking in the search results on google. So having an attractive favicon does also a bit in getting a better click-through rate. Thus, it helps with your website’s SEO.
Make sure you at least have a favicon for your website and not leave it empty. People tend to respond more positively to images than text. The absence of favicon in your website when it is displayed on Google search results can cause some visitors to ignore your page.
The favicon is also visible next to post or page name on the browser tab making it easier to identify and navigate on your website.
Many brands use a favicon which is simply a micro version of the logo.
Here are some common examples of favicon for amazon.com, youtube.com:

Resources to create a Favicon
There are some helpful websites you can use to quickly create a favicon
You can choose to keep the favicon image same as your logo.
How to change Site Title on WordPress
You can change the site title of your blog by going to
Settings -> General -> Site Title
