
A menu is one of the most basic things to have on your website. This simple guide will walk you through the steps on how to add a Menu to your WordPress website.
Menu (also called as Navigation Menu) makes it easy for your website visitors to find important pages on your website.
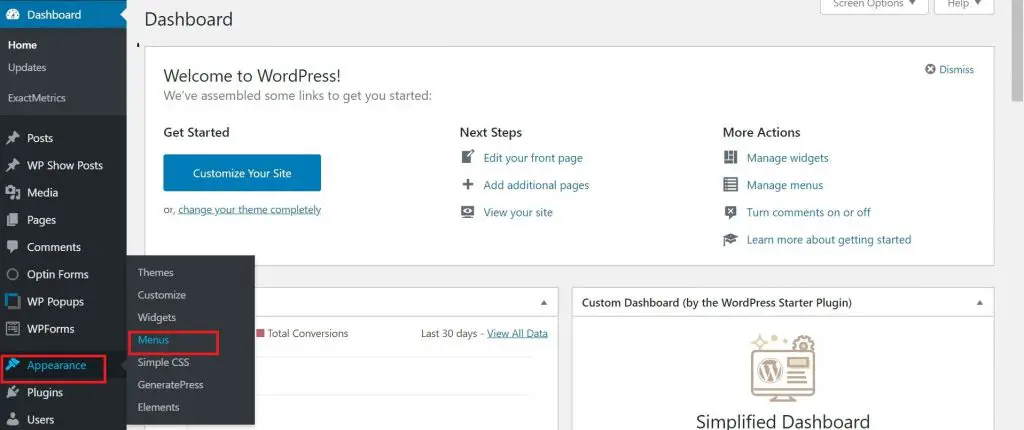
How to add menu to WordPress? You can add menu by going to the Menus in the Appearance section of your WordPress Dashboard.
We will walk you through the complete details on how to go about setting the menu.
Usually, the menu is added to the header section of your website which is the main navigation menu and consists of links to your website content.
A menu can consists of different items like the different pages on your website e.g. Home, About , Contact Page etc. You can also display categories in your menu like a Free Download section or a Blog section in case of Local Business Website.
The common pages of website to have one the menu are the Home, About, Contact, Privacy Policy, Disclaimer pages etc. whose links you will find in most navigation menus.
You can also display certain menu items in the footer instead of having it in the main navigation menu.
Now before going ahead to add a menu, make sure that you have created these items first which are to be shown on your menu i.e.
- For Pages-Make sure you have created the Home Page, About, Contact pages
- For Categories- Make Sure you have created the categories
Note for this guide, I am using the free standard WordPress Twenty Twenty Theme but these steps usually work for most of the themes.
Steps to Add Menu in WordPress
Let’s see the detailed steps on how to add a menu to your WordPress Website (the images are displayed below for easy reference):
- Click on Appearance Section on WordPress Dashboard and select “Menus” from the list of options
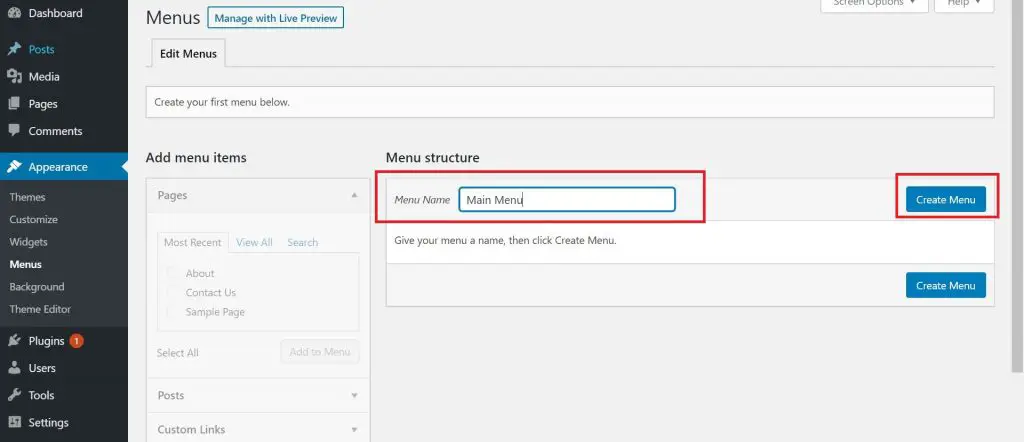
- In the next screen, fill in the “Menu Name” (for e.g. Main Menu) as per your choice and click on “Create Menu”
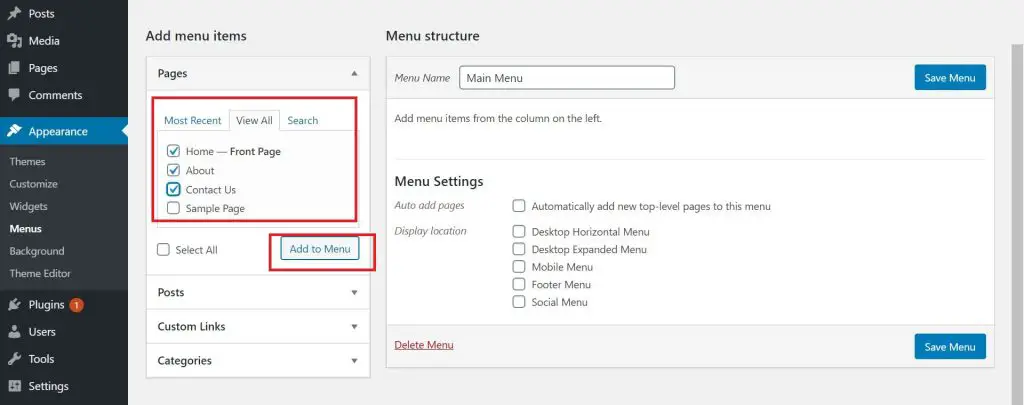
- Next add the items to be displayed on the Menu. You can add items from the Pages, Posts, Categories section on the left. In our example, we are adding only pages. So click on “View All” under the Pages section on the left which shows all the pages you have created.
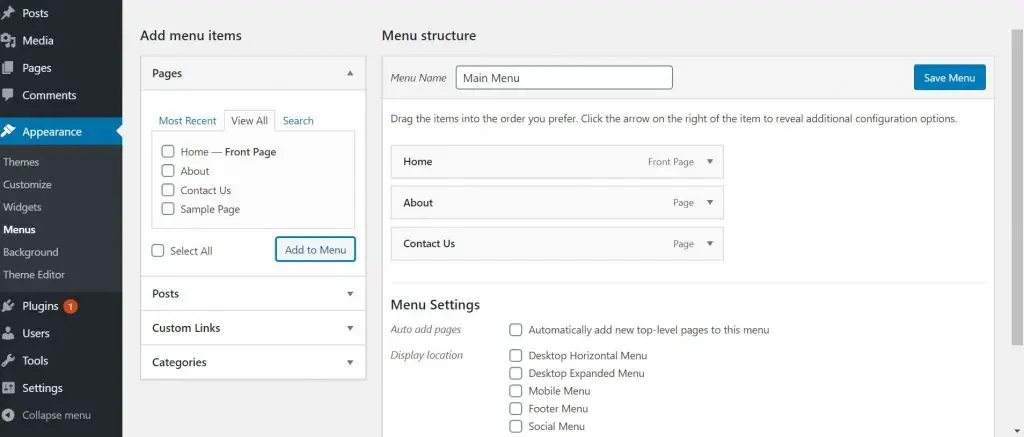
- Select the required items to be displayed on the menu by checking the box and click on “Add to Menu” to show them in the Menu Section. You can drag the items up and down to change the order (if required)
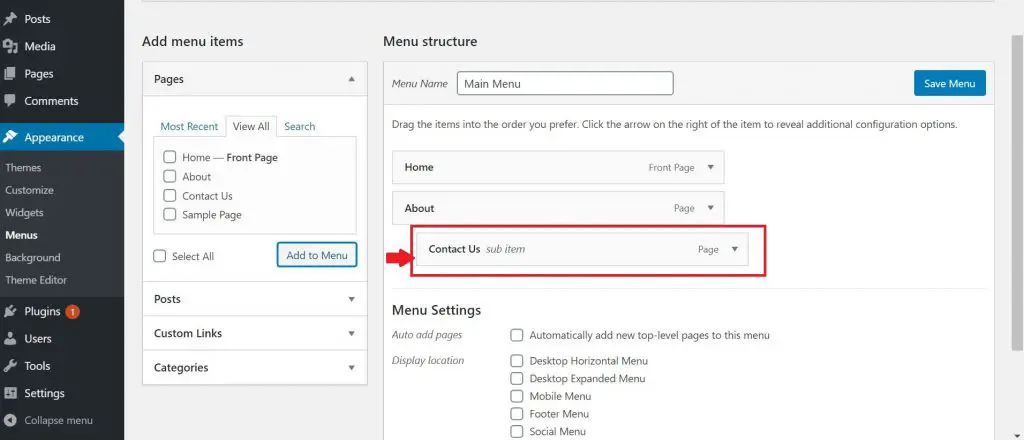
- You can also make any item appear as sub-item of the item above it (as a Drop-Down) by dragging the item slightly to the right. This is usually used if you have different groups or content categories on your website e.g. you may have a Download Category under which you want to show some pages or a Coupons category for free deals etc.
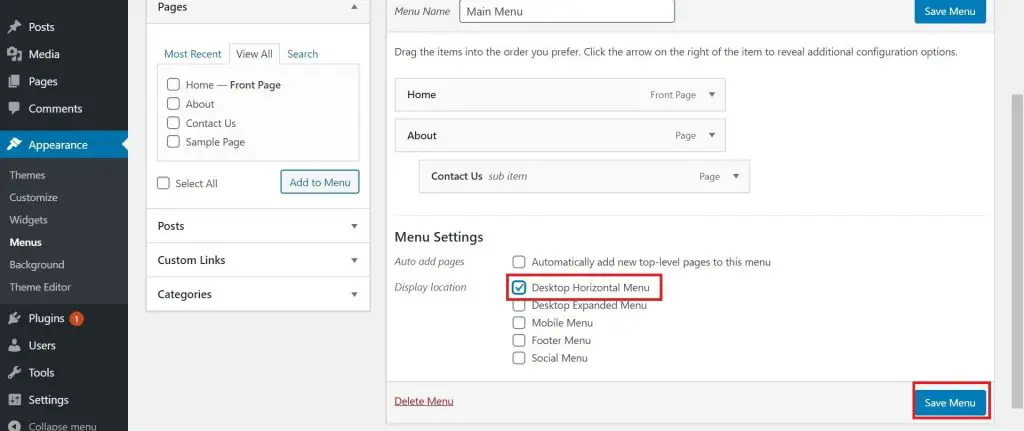
- Scroll down and check the “Desktop Horizontal Menu” in the Display location which is the standard menu layout. This is will display the menu items on the header section in horizontal format.
- Click on “Save Menu” to complete the process and you will see a confirmation message that Menu has been created or updated.
Illustration Images for all the steps in the process
Step 1- Go to the Appearance section on WordPress Dashboard and select “Menus” from the list
Step 2- Give Menu Name and click on ‘Create Menu’
Step 3- Click on ‘View All’ to see list of items which can be added

Step 4- Select the desired items and click on “Add to Menu”
Step 5- Check the items appearing in the Menu in the right order. Drag up or down to change the order
Step 6- To make an item as a Sub-Item of the one above it, drag it slightly to the right
Step 7- Click on “Desktop Horizontal Menu” as display location to display menu items in horizontal format and click “Save Menu”
Now in case of the WordPress Twenty Twenty Theme, one peculiar thing I have noticed that it will still show all pages you have created in header menu by default, in case you don’t have any menu active with display location as “Desktop Horizontal Menu”. So make sure you have created a menu with the display location “Desktop Horizontal” to show only the selected items there. In case you want to show certain pages in the footer section, create another menu with display location as the “Footer menu” for these items.
Also, in case you don’t want to display anything on the header, you still need to create a separate menu with with display location as “Desktop Horizontal Menu” and don’t add any item to that. This will give you a blank display at the header.
You will see a confirmation that the Menu has been updated

Note, that in case of WordPress Twenty Twenty Theme, the menu automatically changes to condensed form (with items visible only on drop-down) when you are viewing the website on a mobile or tablet screen. This is more to adjust with the space and responsiveness.
Also, if you want to customize the menu like change its color, the option to do so is under Appearance-> Customize-> Color. Then change the color of the Header & Footer field. This will change the color of the Header and the Footer. WordPress Twenty Twenty Theme does not give you the option to have separate colors for header and footer although most themes do have these features.
Also, the WordPress Twenty Twenty Theme displays a Search Option by default in the Header. You can remove this by going to Appearance-> Customize-> Theme Options. Uncheck the box “Show search in header” to make it go away.
How to Add a Sub-Item in the Menu
As explained in step 6, you can also make any item appear as sub-item of the item above it (hierarchical structure) by dragging the item slightly to the right. This is usually used if you have different groups or content categories on your website e.g. you may have a Download Category under which you want to show some pages or a Coupons category for free deals etc.
Wrap Up
As you see, its easy to set up the menu in WordPress website. However, the first thing is make sure that you give a good thought as to what items you want to display on the menu. You can also edit the menu in the future by going through the same path.